Upgrading the RAM on your HP 15-fd0081wm laptop is a great way to improve performance, allowing your system to run faster and handle more applications simultaneously. If your laptop is running slow, adding more RAM can help boost speed and efficiency. This guide will take you through the step-by-step process of changing the RAM in your laptop, from preparation to installation and verification.
Understanding RAM and Its Importance
RAM (Random Access Memory) is one of the most crucial components of a computer. It temporarily stores data that the processor needs to access quickly. More RAM means smoother multitasking, faster load times, and better performance for applications such as web browsers, video editing software, and games.
The HP 15-fd0081wm laptop comes with a certain amount of RAM pre-installed, but in many cases, users may want to upgrade it for better performance. Before proceeding, it’s essential to check your laptop’s specifications and ensure compatibility with the new RAM module.
Checking Your Laptop’s Current RAM
Before upgrading, you need to know how much RAM your laptop currently has and what type of RAM is compatible. Follow these steps:
- Check Installed RAM:
- Press
Ctrl + Shift + Escto open the Task Manager. - Click on the Performance tab and select Memory to see the installed RAM.
- Press
- Verify Compatibility:
- Most HP 15-fd0081wm laptops support DDR4-3200 MHz SO-DIMM RAM.
- Check the maximum RAM capacity supported by your laptop (usually up to 16GB or 32GB, depending on the model).
Preparing for the RAM Upgrade
Tools Required:
- A small Phillips-head screwdriver
- An anti-static wrist strap (recommended)
- A plastic pry tool or spudger
- The new RAM module
Safety Precautions:
- Turn off your laptop and disconnect the power adapter.
- Remove the battery if it is removable.
- Work on a flat, static-free surface.
- Use an anti-static wrist strap or touch a metal surface to discharge static electricity before handling the RAM.
Step-by-Step Guide to Changing RAM
1. Power Down and Unplug the Laptop
- Shut down the laptop completely.
- Remove any connected devices and peripherals.
- Unplug the charger to ensure there is no power running through the device.
2. Remove the Battery
- If your model has a removable battery, slide the battery release latch and take it out.
- If the battery is internal, you may need to remove the back cover before accessing it.
3. Access the RAM Slot
- Place the laptop upside down on a soft, non-abrasive surface.
- Use the Phillips-head screwdriver to remove the screws securing the bottom cover.
- Some screws may be hidden under rubber feet or stickers, so check carefully.
- Use a pry tool to carefully lift the bottom panel, starting from one corner and moving around the edges.
4. Remove the Existing RAM Module (If Necessary)
- Locate the RAM slot on the motherboard.
- If there is an existing RAM module, gently push the retaining clips on either side of the module outward.
- The RAM will pop up at an angle. Slide it out carefully without forcing it.
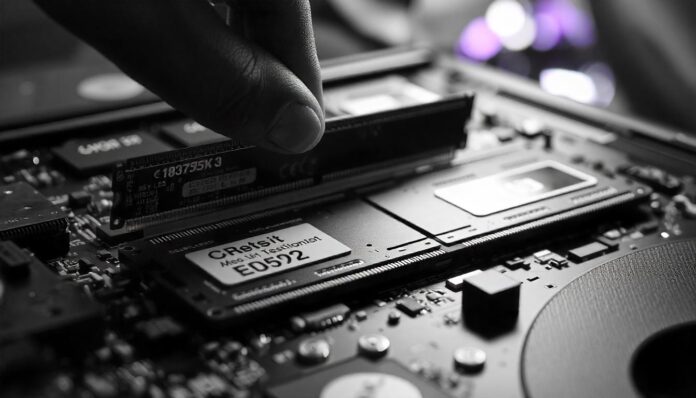
5. Install the New RAM Module
- Align the notch on the new RAM module with the key in the slot.
- Insert the RAM at a 30 to 45-degree angle.
- Press it down gently until the retaining clips snap into place.
6. Reassemble the Laptop
- Place the bottom cover back and press down evenly to snap it into place.
- Secure the screws tightly using the screwdriver.
- Reinsert the battery if it was removed earlier.
Verifying the RAM Upgrade
Once you’ve installed the new RAM, it’s important to check if your laptop recognizes it properly.
- Turn On the Laptop
- Reconnect the charger if needed and power on the laptop.
- Check System Information
- Press
Windows + R, typedxdiag, and press Enter. - Under System Information, check the total RAM displayed.
- Alternatively, go to Task Manager > Performance > Memory to see if the new RAM is detected.
- Press
Troubleshooting Common Issues
If your laptop does not recognize the new RAM or does not boot properly, try these troubleshooting steps:
- Reseat the RAM: Remove the RAM and reinstall it, ensuring it is properly aligned and clicked into place.
- Check Compatibility: Make sure the RAM module matches the specifications supported by your laptop.
- Update BIOS: Some laptops require a BIOS update to support new RAM.
- Try a Different Slot: If your laptop has multiple RAM slots, try installing the module in another slot.
Benefits of Upgrading RAM
Upgrading your RAM can provide several benefits, including:
- Faster Performance: Applications load more quickly and run more smoothly.
- Better Multitasking: Handle multiple programs simultaneously without slowdowns.
- Improved Gaming: Many modern games require more RAM for optimal performance.
- Extended Laptop Lifespan: Enhances the overall usability and longevity of your laptop.
Conclusion
Upgrading the RAM on an HP 15-fd0081wm laptop is a simple and cost-effective way to enhance its performance. By following this step-by-step guide, you can successfully install new RAM and enjoy a faster and more efficient computing experience. Whether you’re a student, professional, or casual user, adding more RAM can make a significant difference in your laptop’s speed and responsiveness. Always ensure compatibility, follow safety precautions, and verify the upgrade to get the best results.
